


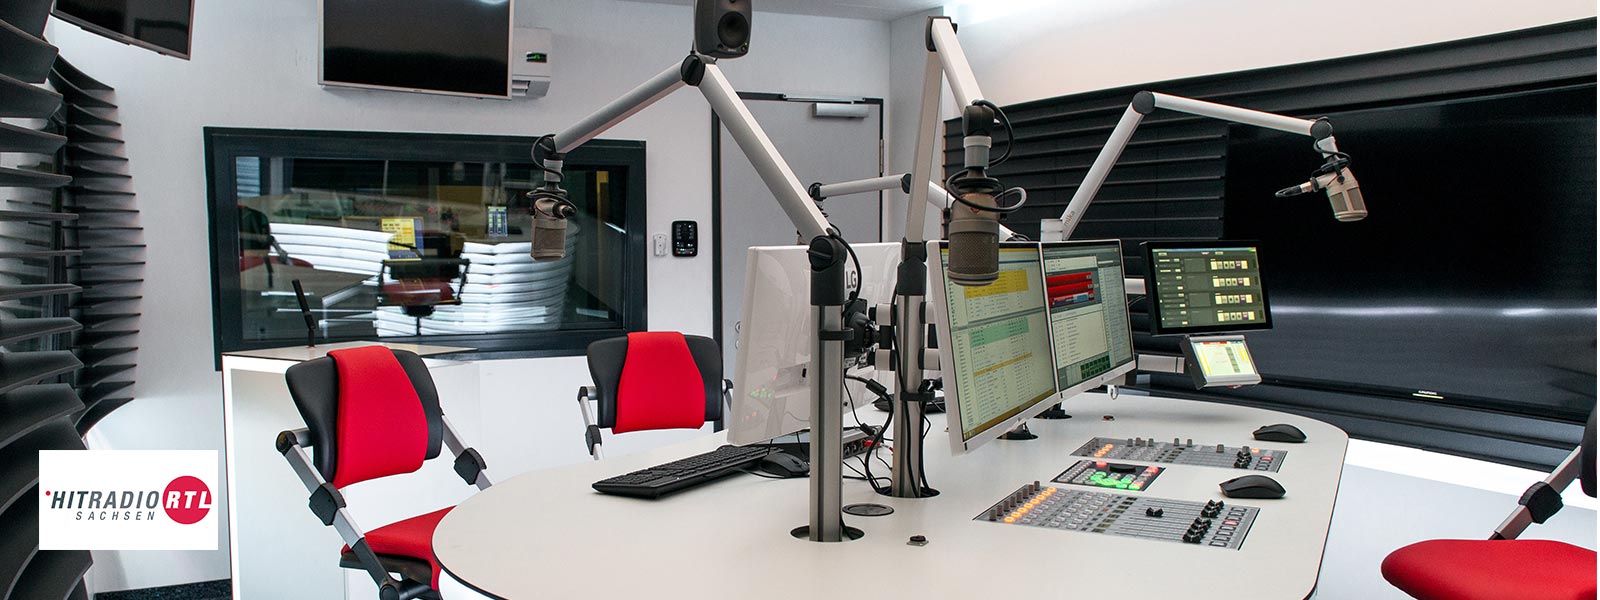
Create studio space in the smallest room.
Go OnAir and show it in dual-color.

Capture the perfect camera angle.
Get the all-in package.

The intelligent tool-kit solution.
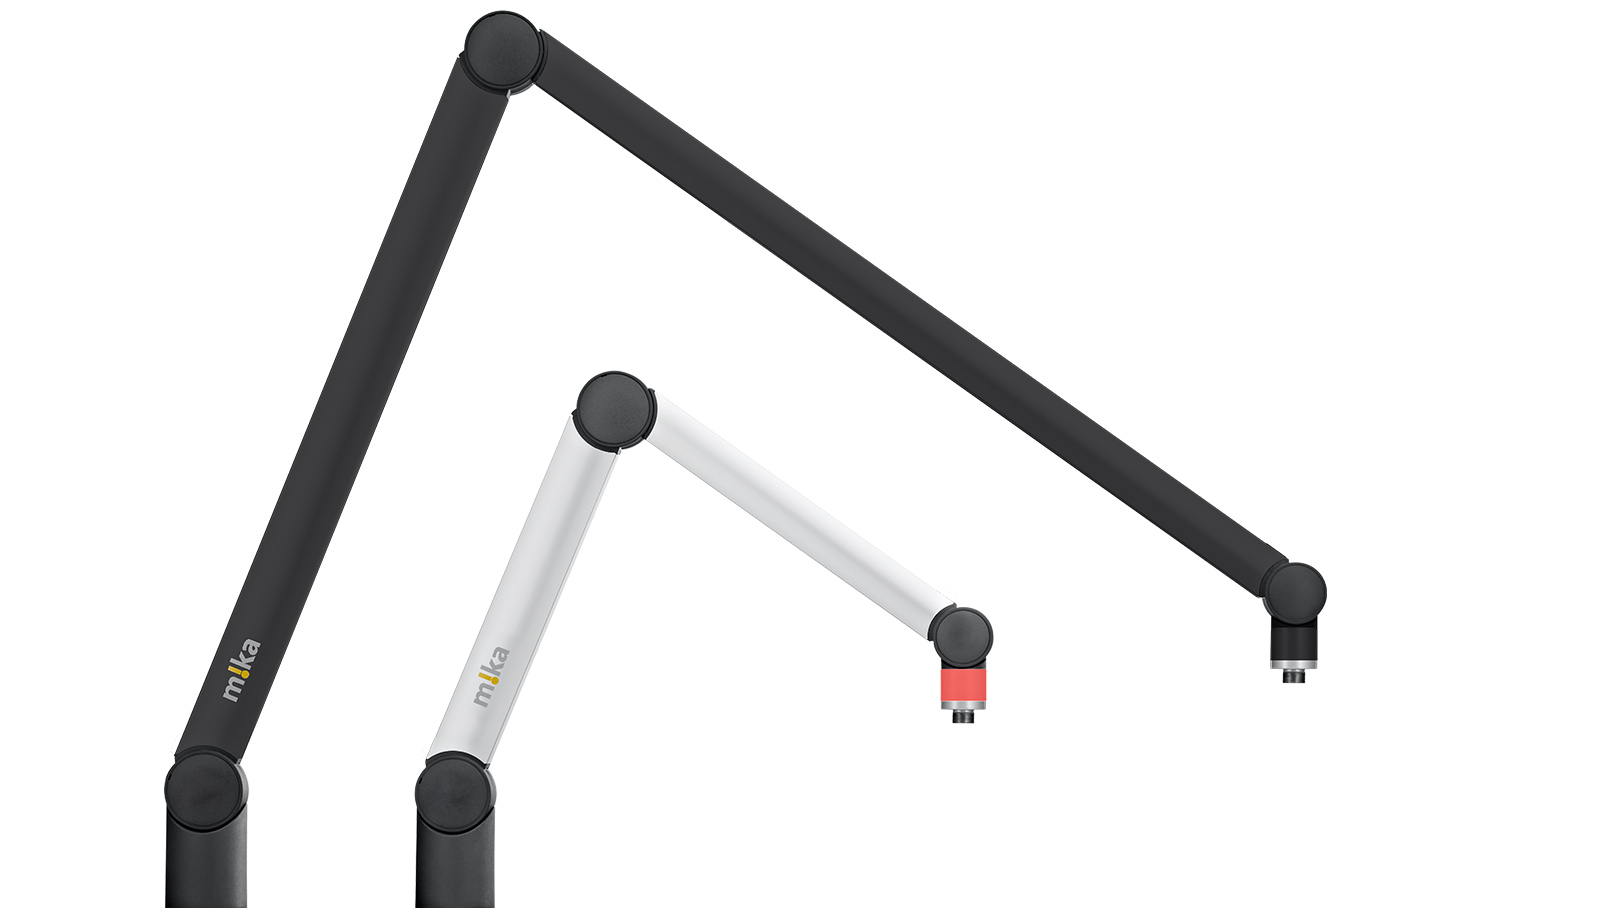
m!ka. Incomparable efficiency in mounting.
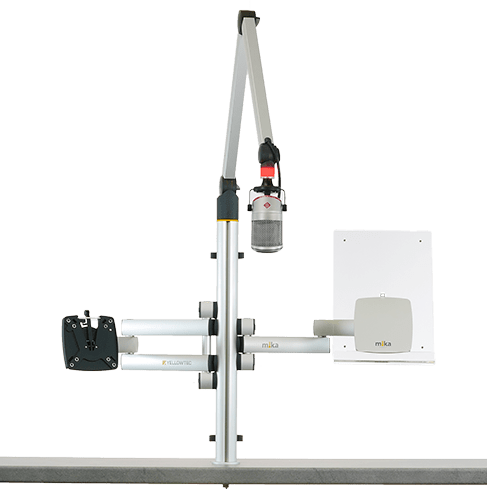
With the m!ka Mic and Monitor Mounting System you can design your individual studio setup in the most flexible way. m!ka provides powerful components to integrate your microphones and monitors. Choose from loads of elegant options to arrange your gear and mount your individual combination of elements wherever you want.

Like no other. m!ka is a real beauty.
m!ka's anodized metallic look stands out. Go for black to contrast your bright ideas or choose discreetly shimmering aluminum. Light or dark, m!ka elegantly keeps your desktop clean by hiding most of your cables and reducing the number of mounts. m!ka is the system to success. Be amazed how much more room for your ideas there is to gain.
Start from scratch or pick from sets.
Either start from scratch and create your own combination of m!ka elements or have a look at the range of m!ka Sets to get inspired. The sets reflect the most popular arrangements. Pick from twelve different compositions and optionally upgrade them with further m!ka elements. No matter what you long for, m!ka has all the options ready for you.
Aaaand action! m!ka is camera ready.
For video calls, streaming and visual radio, we redefined m!ka by expanding the mounting system. Especially for video applications, we designed three new components that perfectly match all other m!ka elements. If you create video content, check out the m!ka CamStud, the m!ka CamArm and the m!ka Mic Arm TV.
Add a camera to your setup.
With m!ka CamStud you get smooth camera integration for cams with 1/4" screw. Place it on top of a m!ka Pole, litt Riser or even directly on a m!ka CamArm. Thanks to its integrated ball joint, m!ka CamStud always gets you the required camera angle to catch a meaningful perspective!
A close view of things.
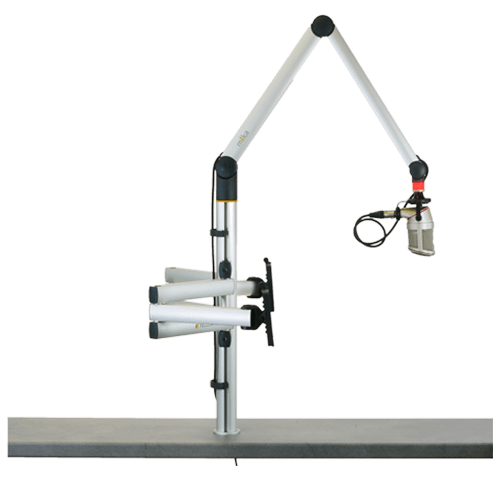
To let your webcam capture an unobstructed view of the scenes, we designed the m!k Mic Arm TV. Wherever you need free vision, the low profile microphone arm offers just that. It hovers just above desktop level. Easily mount it to a m!ka Pole and place it wherever you want.
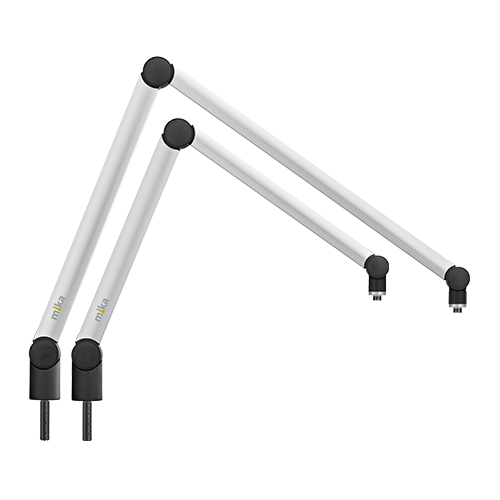
Your microphone's best mate.
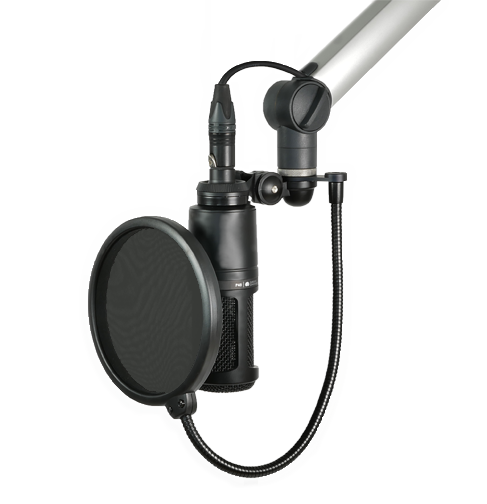
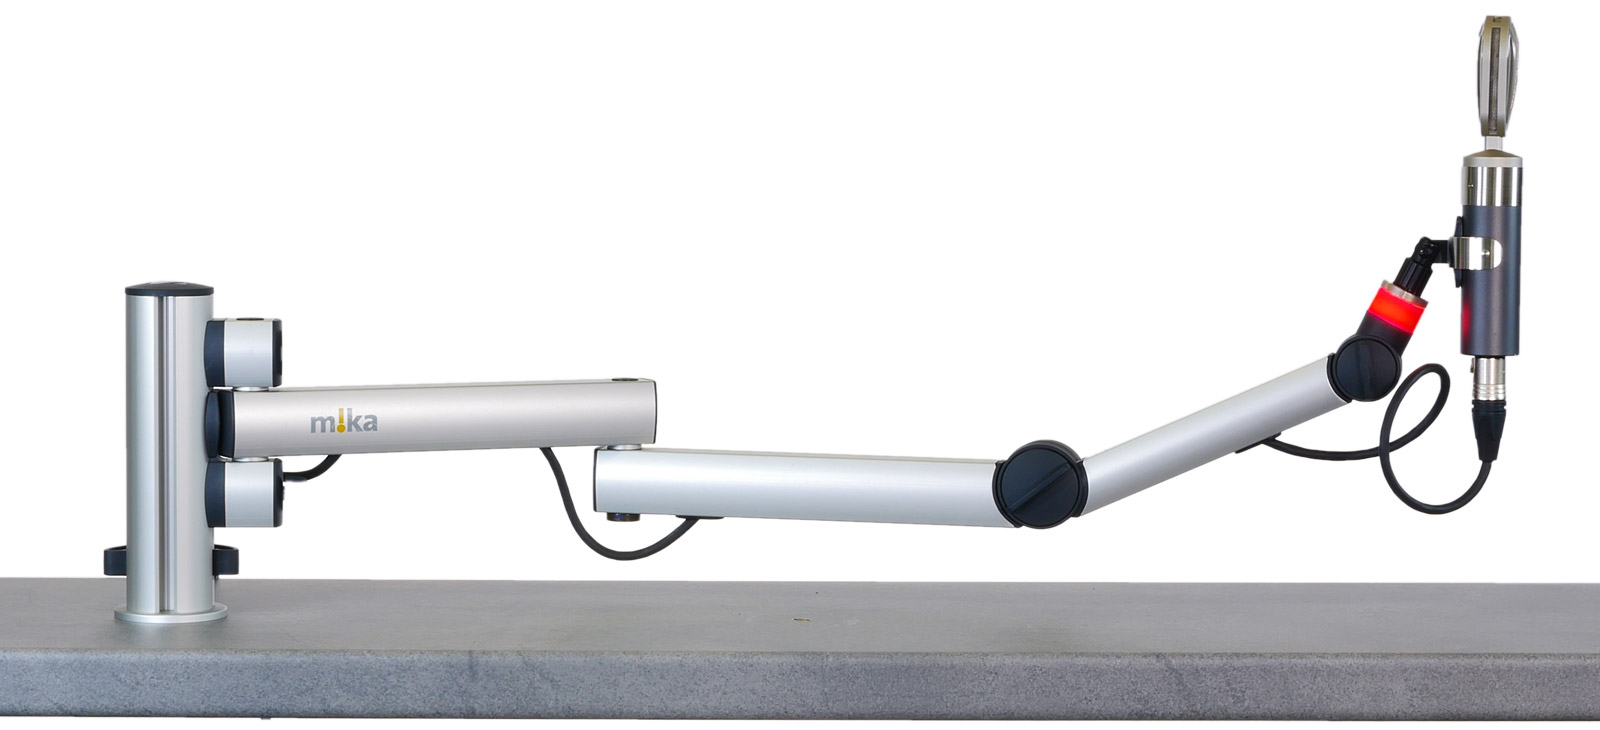
Let m!ka become your microphone's reliable companion. Mount its clamp to the standard 5/8" thread and hook it up via the arm's inboard mic cable. m!ka Mic Arms are pre-weighted to fit most standard microphones. Whenever needed you can fine balance the arm by adjusting the internal spring system. Even heavy microphones can be perfectly counterbalanced for untroubled use. Let the show begin.

Small details make a huge difference.
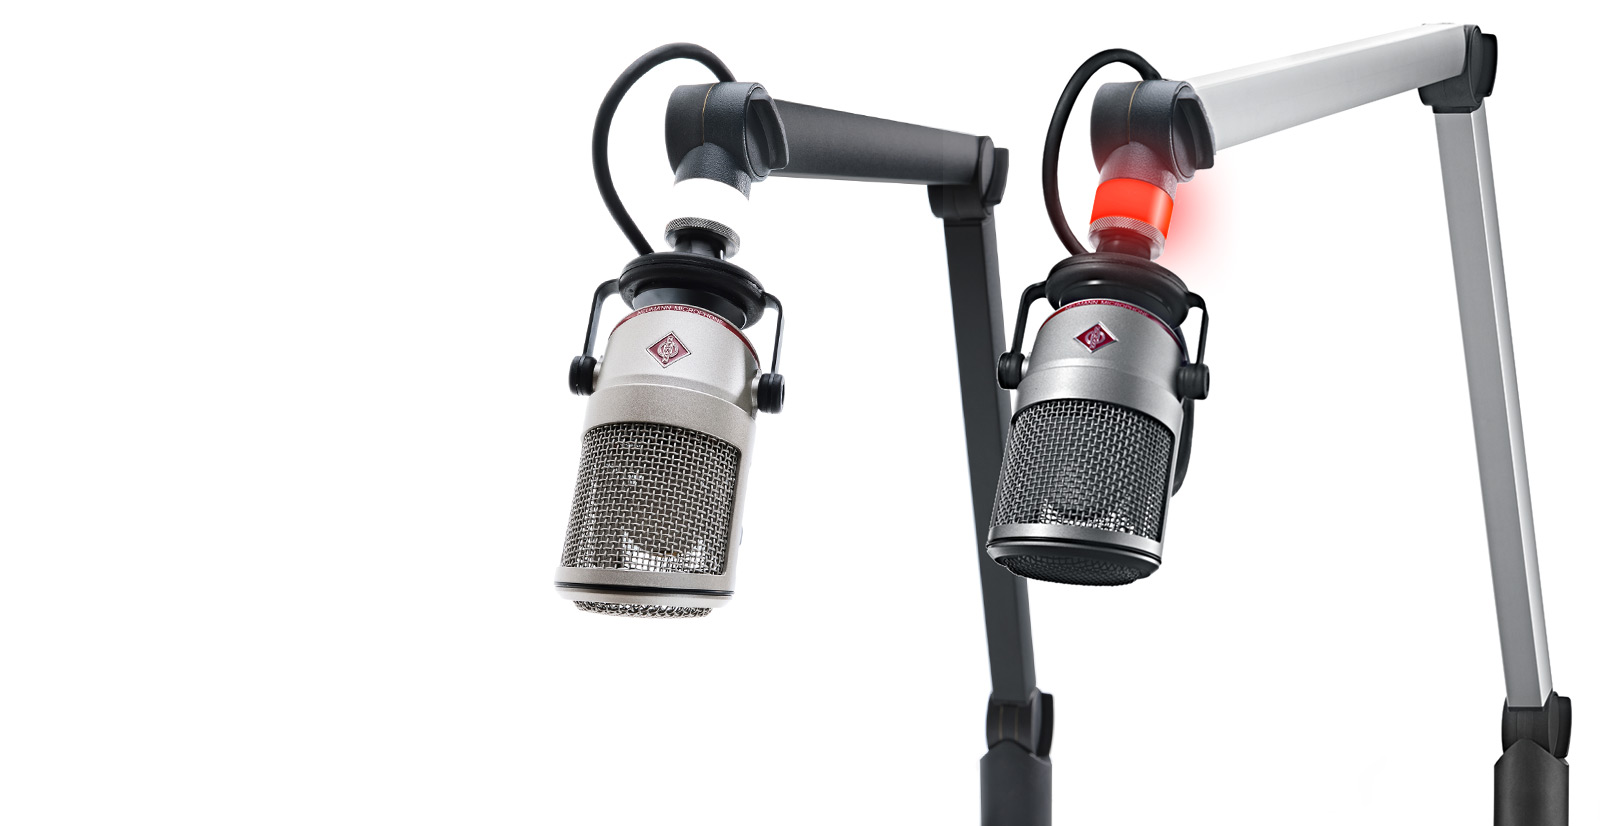
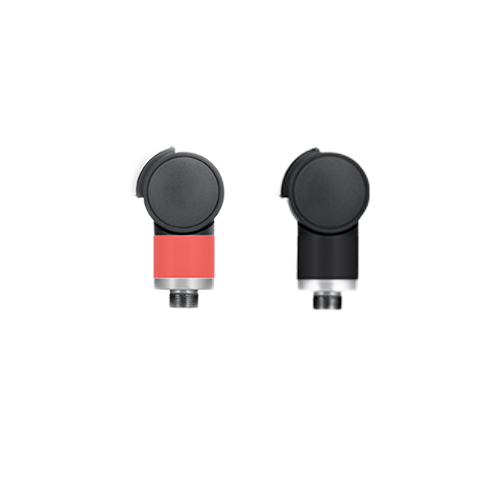
Each m!ka model is available in two versions, either with or without 'On Air' indicator. Enjoy to find your indicator exactly where you need it: just above your microphone. The 360° signaling light is doubtlessly telling anybody around that you are On Air.
Make most of 360° OnAir indication.
All m!ka On Air Arms use the same CleanVision® technology which made our litt Signaling Light so desirable. The 360° indicator provides a much better recognition than ever experienced before. At the same time it will not glare at short distance.
Two states, two colors.
Why indicate On Air only? In addition to the prominent red for On Air indication you get white, too. Use it, for instance, to indicate that your mic is ready. To do so, simply reverse the polarity of the drive voltage and toggle between red and white signaling.

More room for your ideas with m!ka Monitor Arms.
m!ka Monitor Arms help you to efficiently use limited space. With m!ka placing multiple monitors next or on top of each other becomes a piece of cake. Give your m!ka Monitor Arm additional functions by combining it with m!ka Accessories. What about a Copy Stand or a Pad-Dock for your mobile device?

Smarter options.
Making m!ka even more flexible, the monitor arms' head joints now offer easier adjustment. With their design, you are able to independently set the friction of your monitor's horizontal and vertical tilt. You want to easily tilt your monitor vertically without changing its horizontal position? No problem. Take the next step in tailoring your setup.
Monitor mounting at its best.
All m!ka Monitor Arms offer a head joint that can be adjusted in multiple ways. It guarantees improved and simplified friction adjustments. Take monitor arrangement one step further.
Your monitor fits. For sure.
Get a new monitor that fits first? Not with m!ka! The QuickFix Adapter for VESA75 and VESA100 makes every m!ka Monitor Arms a magic bullet for all types of monitors.


As versatile as your ideas.
Various m!ka Accessories serve as add-ons. They equip m!ka Monitor Arms with additional functions. Thanks to QuickFix.
m!ka CopyStand. So much space for notes.
Make m!ka Copy Stand your versatile script holder by attaching it to a m!ka Monitor Arm. Its Perspex® stand is available in landscape (A3) or portrait (A4) format. Thanks to the intelligent magnetic fixture system, a second Perspex® panel can be fixed on top of the other. Between both panels there's room to temporarily or permanently fix notes.
m!ka Pad-Dock. Securely fastens your tablet.
To integrate a tablet device into your setup, choose your favored m!ka Monitor Arm and within seconds attach m!ka Pad-Dock via QuickFix. By adapting to individual sizes, the Pad-Dock securely fastens your tablet. Still, you never give up the benefits of a mobile device. Easily detach the tablet from the bracket whenever you want to take it with you.
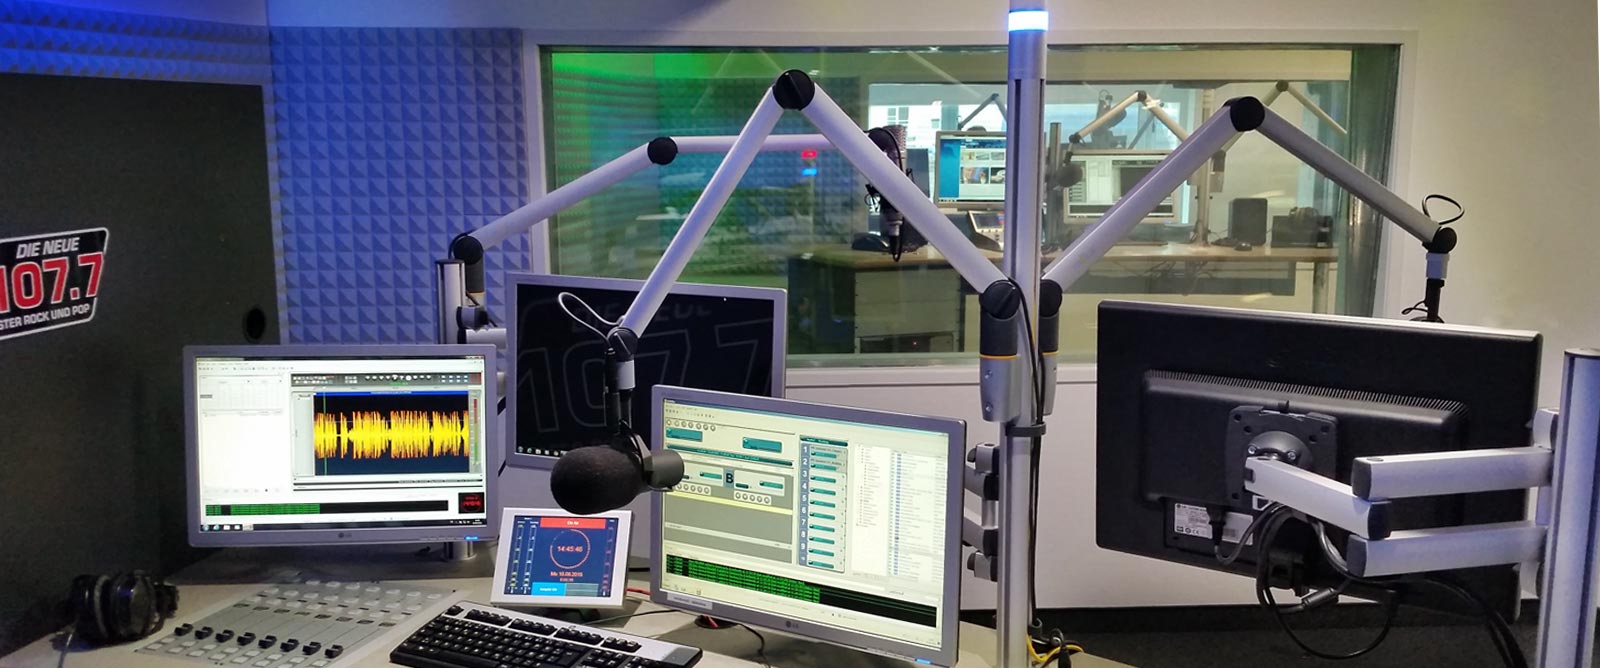
Mount m!ka wherever you like.
Making most of mounting options? That's what m!ka gets you. Make use of the great variety of mounting options offered by the m!ka System's arms and accessories. The options go on and on and on...
Mount m!ka to surfaces of all kinds.
A broad range of mounting devices equips you with the right parts to mount your m!ka System in the best possible way. Thanks to different supports, m!ka Mic Arms can be attached to desks of different panel thickness, to m!ka System Walls or directly to your room walls. Enjoy even more flexibility by combining m!ka Mic Arms and m!ka Poles.
m!ka Poles allow for additional flexibility.
When it comes to mounting m!ka Monitor Arms or Accessories, m!ka Poles serve as a backbone. The poles are available in two versions: Either fix them to walls (Wall Mount Poles) or choose a 360° version (System Poles). According to your needs, we offer multiple options to mount poles to your desk, wall or ceiling to position your m!ka equipment wherever you wish.
Specs: m!ka System


How To Video Clips
Our m!ka How To Clips give you an overview of the m!ka Mounting System. They show you how to combine m!ka elements and explain the various available mounting options. On top, you get various tricks on how to make most of m!ka. For example we how to perfetly balance your m!ka Mic Arm with your microphone's weight.


Frequently asked questions
-
Where do I get guidance and detailed instructions concerning m!ka products?
You're looking for information about how to mount m!ka? Or you're wondering about how to combine the m!ka System's various elements?
Our m!ka How To Clips offer you advice and give you an overview of available mounting options and give you advice on how to install and mount m!ka. One video also shows you how to balance the m!ka Mic Arm with the weight of your microphone.
Also please have a look at the m!ka Briefing Book. With the help of graphics, it shows you what you should pay attention to and serves as a step-by-step guide. -
Is it possible to deactivate the m!ka Monitor Arm's QuickFix function?
YES.
The m!ka Mic Arm's QuickFix function allows for easy installation of monitors. With the help of a release lever, it locks your equipment in place.
Nevertheless, you always have the choice to deactivate QuickFix. Simply turn in the screw placed next to the release lever on the m!ka Monitor Arm's head in order to disengage the QuickFix function. Doing so, your monitor or m!ka Accessory is permanently fixed to the arm until you decide to loosen the screw again. To take full advantage of QuickFix again, simply loosen the screw anytime.
-
How to install a microphone?
One of our m!ka How To Clips shows you how to install a microphone to your m!ka Mic Arm.
Please follow the following steps to install and wire your microphone:
STEP 1:
Cut off the black and yellow wires on the upper end of the cable. They are not connected and do not carry any voltage. Always make sure to leave adequate cable lengths before you cut the cable to fit the mic. It is not possible to install a new cable loom inside the m!ka Mic Arm.STEP 2:
To install your microphone, we recommend the use of standard XLR connectors. Please note that XLR-connectors are not included when ordering a m!ka Mic Arm.a) m!ka On Air Arms
To install m!ka On Air Arms, we suggest to use XLR-5 pin connectors for microphone signal and on air light feed on the lower end of the cable and XLR-3 type connectors for microphone on the cable's upper end.b) m!ka Arms WITHOUT on air function
For m!ka Arms without on air function please use XLR-3 connectors on both ends of the cable.STEP 3:
Simply connect your mic via XLR-connection.Find more information on page 4 of our m!ka Briefing Book.
-
How can I adapt the m!ka Mic Arm to my mic's weight?
One of our How To Video Clips shows you how to perfectly balance your m!ka Mic Arm with the weight of your individual microphone.
Please check out the video HERE and follow these steps:
STEP 1:
Make sure that all three T-screws are not too tight but in a somewhat loose position. Then identify the screw on the bottom of the m!ka Mic Arm and adjust your arm with your mic attached to have it levitate in your favored position.STEP 2:
Now fasten the T-screws just enough to perfectly hold the mic in any position wherever you pull it. Do not pull the knurled screws too tight. They may break and the joints may squeak. Instead readjust the screw inside the bottom as in Step 1 in case you are not happy with the result of your adjustment.Find more information on page 11 of the m!ka Briefing Book.
-
How do I change the on air indicator's color?
To change you m!ka Mic Arm's on air signaling color from red to white simply reverse the polarity of the drive voltage.
a) Red signal
Wire m!ka On Air Mic Arms as usual to achieve red on air signaling.
Wiring for red signal: BLK = 0V YEL=+12-24VDCb) White signal
Reverse polarity to make use of a white on air light.
Wiring for white signal: BLK=+12-24VDC YEL=0Vc) Red AND white signal
To make most of the dual color indicator, use both colors.
Therefore, use a switch to toggle between red and white.Find more information on page 4 of the m!ka Briefing Book.
-
Is it possible to equip previous m!ka On Air Mic Arms models with the dual color signal?
YES.
By swapping only the joint instead of the whole m!ka On Air Mic Arm, you have the option to easily upgrade your existing m!ka On Air Arm with CleanVision® lighting characteristics in dual color. How easy it is to swap head joints is shown in this short video tutorial.
-
How do I prevent my m!ka Arms from squeaking?
If your m!ka Arms ever squeak or if you can't put your mic in position smoothly, there is an easy solution for that:
Simply use common Teflon spray and place it on the joints. You will immediately experience the smoothness you are used to when using m!ka.
In general, squeaking arms indicate that your arms aren't adjusted to your gear's weight. Please follow the instructions for adjusting the arms to never get near squeaking m!ka Arms.
This How To Video Clip shows you how to adjust your m!ka Mic Arm correctly.
Didn't find the answer you were looking for? Then contact us via email:
servicecenter@yellowtec.com